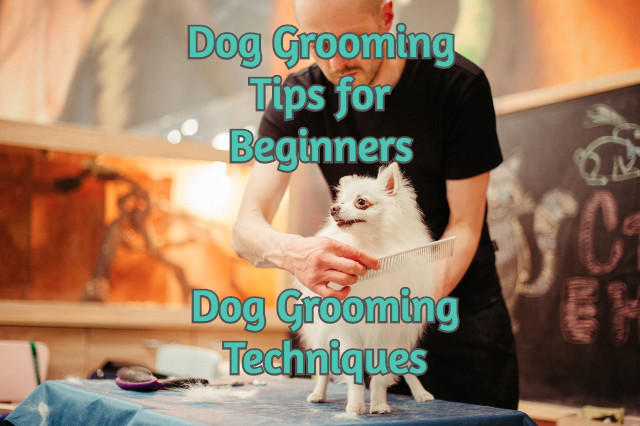
Welcome to our third part of Dog Grooming Tips For Beginners. This time, we will look at some Dog Grooming Techniques.
A professional dog groomer never stops learning new things. Every day there is something new to study or some new trend discovered. A technique that was acquired 10 years ago may change, and you have to adapt to the new ways things are done. However, the primary methods remain the same as they are tried and tested.
If you love working with animals (mainly dogs and cats), then a little extra study from time to time will no doubt be something that will interest and excite you.
Actually, in the next few weeks, I’ll be writing a post about the different courses of study available for working with animals, and grooming will indeed be one of the course topics.
Back to today, though. Dog Grooming, like hairdressing, is an art-form. The groomer is both a stylist but also, and more importantly, somebody who has knowledge of dog/cat health, the level of which will depend on their studies but all groomers should have studied basic hygiene and health.
Before taking your dog to a groomer, it is always best to ensure that you’re leaving her with somebody you can trust. Somebody who has the proper knowledge and skills in the following techniques, which are regularly used depending on the breed. This is, of course, after a good revision of your pet to make sure all is looking healthy, i.e. ears, paws, tail.
The aim of the groomer’s work is to make sure the animal ends up with an excellent aspect to their coat and overall condition. The coat must, in many cases, last a long time before another session so it should be able to protect your cat or dog in any season of the year.
The techniques used will all depend on the breed of dog or cat, the type of coat, the kind of cut requested by the client where appropriate for the breed, and other possible factors concerning each individual.
==================================
It must be warned that these techniques require proper training from a professional dog groomer. If they are used in the wrong way, your dog/cat may end up with an injury, or at the very least, a terrible hairstyle!
==================================
Stripping
Described in our last post here. This is the action of using a stripping knife to renew the hair in rough/wire-haired breeds such as the Schnauzer. The end result is a more robust and healthier coat.
Plucking
This involves literally pulling the hairs out with the fingers, using a rubber thimble as an aid if required. This is standard practice when removing hair from inside the ear canal of dogs or removing dead hairs from a cat.
Blending
This requires precision cutting. Blending means it is impossible to detect the fusion of one length of coat or layer with the next. All areas of the body are cut in such a way to conceal the “joins” of different zones. They are blended together.
Top-Knot
You might consider this one pretty easy. It is, after all, a ponytail on top of the head. However, there is skill involved in this so that the long hair which would typically hide your pet’s eyes, is pulled back but in such a way, that it doesn’t bother the animal. Going from personal experience, if I pull my ponytail too tight, I get a headache. So it’s always something to bear in mind if you do do this because your dog/cat can’t tell you if they have a headache and then reach for the paracetamol! There is a technique to it.
Genital Shaving
Yep, you read that right. This is for hygiene purposes and requires a very steady hand and the correct electric razor. As you can imagine, the hair around this area gets slightly dirty so best to keep it as clean as possible.
Carding
This is a technique which gets rid of dead hair from the undercoat. Whether you use a stripping knife (blunt is best here) or a Furminator, carding will remove the sub-coat leaving your angel feeling a lot fresher.
The hair is “dragged” out through the top-coat so you must be careful not to damage this. It takes skill and knowledge to get this right without damaging the top hair.
Any damage will be seen after a few weeks of hair growth. To finish, the coat is gone over with a comb to remove any stray hairs. The skin must be checked regularly for any sign of irritation. Not ideal for all breeds.
Clipper work (Flatwork)
Using a Shearing machine for a short effect. Flatwork, however, uses a longer blade for a more attractive finish.
Pedicure
Using either a small electric razor or rounded scissors (carefully), the hair between each paw pad is removed. At this stage, you could find anything stuck in there – chewing gum, cigarette butts, leaves, thistles you name it. This routine is vital for healthy paws.
==> ULTIMATE CAT SECRETS – 12 PART AUDIO PROGRAM <==
Summing-up
The above dog grooming techniques are necessary – according to each breed – so that your canine and feline friends maintain correct hygienic conditions. They will also be happier for it because they cannot get rid of excess dead hair themselves as they used to in the wild, rubbing up against trees or rocks.
Some groomers will include most of the techniques in a set price while others may decide to charge separately for extra work and concentrate on the basic needs of getting your dog clean.
Dog Grooming Tips For Beginners – Dog Grooming Techniques
If you fancy becoming a professional dog groomer, why not subscribe for updates here because coming soon, there’ll be a post about online animal courses you can take – grooming and other animal-related topics.
What do you think? If you found this post interesting, feel free to like it and comment below, and share with friends and family. My post regarding dog grooming tools may also be of interest. Thank you for reading.


As an animal lover myself, I enjoyed this post on dog grooming tips. Styling a dog’s coat definitely sounds a lot like hairdressing. I’ve not heard of blending, but it sounds a lot like cutting human hair into layers so you get a neat blended look. I’d certainly leave it to the professionals though as I dread to think what my poor dog would look like, if I had one lol! Thanks for sharing:)
Very interesting post about dog grooming techniques. I don’t own a dog but it looks like you’ve covered all the areas of grooming you beautiful pup.
So of the grooming areas I found an interesting reading especially the pedicure and keeping the paws cleans.
Thank you for sharing this valuable post for dog owners.
I find your article useful not only for those who strive to become professional groomers, but for all dog owners who would rather pamper their baby themselves than leave that task to someone else.
Our dog is short haired, so her grooming consists mostly of going through her hair with a Furminator. It took some time to learn how to handle it properly, though, not to overdo it and be extremely careful at sensitive areas. We still do not dare to cut her nails, but we have an angel as her trainer, so she does it for us.
I didn’t realize that so many different grooming techniques existed.
My girlfriend has just brought a golden labrador. I think it is going to take a lot more work and time to look after him than I previously imagined.
I’ll have to go nd check out your other post to see what else I can learn.
Many thanks for the information.
ha ha Kathy, thanks for your comment. Yes, it’s more complicated than some people realise. I’d say your assumption is about right really.
I’m very happy you found this post valuable, Habib. Yes, it’s really quite amazing what you can find stuck within a dog’s paw pads!
Hi Kerryanne. Yes, some of the tools are harder to use than they seem. And it is best to have a professional or someone who knows what they’re doing cut the nails if you’re not sure because there can be a lot of blood if done incorrectly! Thank you for your kind comments.
I love Labradors!! You’ll get plenty of unconditional love and attention from that one haha Being shorthaired, a daily brush will be good and a good bath if he/she gets dirty or goes swimming as they love to do. Thank you for your comments. I hope you find more useful information for you and your new dog.
Hi Susan ,thank you for this nice article ,it is exactely what i needed to take care of my dog .I am going to use this list each time as my check list i will let you know if there is anything else .I am also going to share this with my neighbor ,he has 3 dogs and 2 cats ,i am sure he is going to like this .Thank you Susan
Hello Jim. Thank you for sharing with your neighbour. I´m very pleased you´re able to use this post as your checklist. All I try to do is provide useful information so thank you again.