Health and Hygiene
– Bath Time
Welcome to the first of our series of articles on Dog Grooming Tips For Beginners.
Whether you decide to clean your pet at home or not, it’s always best to take them to a professional dog or cat groomer every so often, primarily if their coat has grown too long or too tangled.
Regular brushing every day will avoid that your pet suffers any discomfort from tangles and regular visits to the salon will depend on the breed and the environment in which he/she lives and roams.

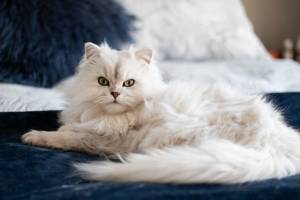
Cats won’t need bathing very often as they groom themselves and you don’t want to remove any natural oils their bodies produce by over-bathing them yourself. However, they do still require a good brush, especially long-haired breeds, as this will help to avoid furballs.
Stay away from the shears!
In the summer, when it’s hot, there is no need to think of shearing your pets. Most breeds have coats that cater for both hot and cold weather. Those with thick, long coats will generally have layered fur which allows air to flow freely and, therefore, cool your dog down. Same with cats.
Shearing a coat without the correct and prior knowledge could lead to potential health problems, and this is why I recommend regular sessions with a professional groomer.
Don’t laugh at them; they’re suffering.
If you see your pet scraping its bottom along the floor, it’s not a laughing matter. They feel discomfort and irritation “down below”, and this needs to be checked out as soon as possible. Maybe they have blocked or impacted anal glands.
A groomer can advise you on several fundamental health issues, inflamed anal glands being one of them. The groomer will express (squeeze) the glands just before shampooing. It is generally required in medium/large breeds, although smaller animals can have the issue too. The inflammation will cause lots of itchiness hence the floor scraping.
Ear mites, fleas, ticks
Your groomer will also check for ear mites and fleas, ticks, and anything stuck between the pads of the paws, and teeth cleaning. They will let you know if they find anything during the grooming session like lumps or issues where a visit to the veterinary clinic is necessary.
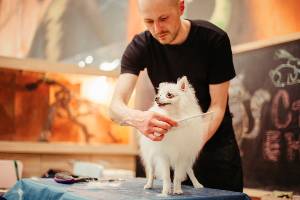
Dog and cat groomers use various techniques to care for the hygiene of your pet, depending on their size and breed.
Generally, a session will begin will a comb or brush-through on the table. This is when ears are checked and the nails clipped if needed.
Be sure to inform the groomer of any issues or traumas that your pet has. Some dogs, for example, will need to wear a muzzle as they will feel scared and may bite.
Please inform the professional of any injuries, illnesses, skin conditions so they can take the proper amount of care during the session.
We start this series of articles by looking at how to bathe your pooch:
==========================================
Gently talking to the animal, giving lots of love and praise, will help to calm down any nerves. Love what you do. Pet grooming is for true animal lovers. You will also need a strong back!
==========================================
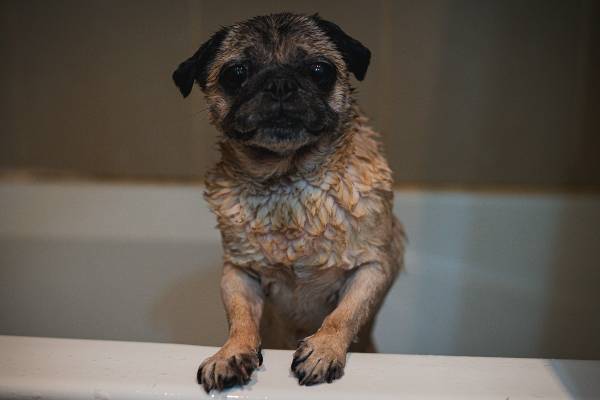
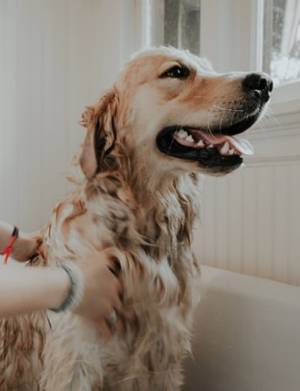
The bath
After a prior comb and brush through, detangling knots and removing any matting, the groomer places and attaches the dog inside the bath with a lead. Next, the groomer must deal with the anal glands of the animal in the tub. Some groomers do this as a matter of course for the wellbeing of the pet. Others will do so on a by-request basis.
The groomer extirpates (squeezes) the anal glands if necessary. From personal experience of having to do this, I recommend doing so at arm’s length, standing towards the head. Be prepared for the smell! I recommend using gloves.
You will need to learn the exact technique from a professional so as not to cause any harm or cause infection or injury.
The left-hand side
1. The dog or cat stands with his head to your left, so you have his left side towards you in the bath. Starting at the bottom of the left rear paw (the pads), checking the temperature of the water is ok beforehand, start showering gently between the pads and working up the leg, lifting the layers of fur as you go. Don’t forget the inside of the leg and as you reach the tail, give the anal area a good dose of water to get rid of any glandular residue which might remain.
2. Lifting layers of hair along the tail, you then continue in the same manner up the back, belly, the “armpits”. Then starting with the pads of the left front leg, work your way up towards the chest, lifting layers as you go, making sure the water reaches through to the skin all the time. There should be no dry coat.
3. From the chest towards the neck, you leave the head until later on so as not to frighten them.
 4. Returning to the left rear paw, you start applying the correct shampoo for the hair type. Squirt the liquid directly from the bottle onto the skin between the layers. Thoroughly lather up the paws between both hands and in-between the pads as these will get the dirtiest every day. Be mindful to check for any leaves, chewing gum, cigarette butts (it happens), ticks or thorns/prickles, anything and remove as you go.
5. In an upwards direction on the leg, working a lather into the layers, be sure not to work in a circular motion because you will only tangle up the hair creating more knots which will make drying more difficult afterwards.
6. Move up to the anus giving that and the reproductive organs an extra soaping, not forgetting the tail, and work up towards the head as before.
7. Once you’ve soaped up the front left leg, chest and neck, then it’s time for rinsing. Holding the shower in your right hand (if you’re right-handed) and using the left hand to “push” the water and soap backwards and downwards, lifting the layers as you go, you are washing away all the dirt from the previously cleaned sections of the body.
8. Generally, there will be a raised, perforated mat on the floor of the bath so all the soapy, dirty water can flow away, leaving the paws standing on a clean surface.
9. As we shower away the soap, we leave the coat and more importantly, the skin soap-free. Now the whole of the left side should be completely clean. If necessary, use conditioner sparingly and follow the same routine.
10. With a soap-free hand, double-check there is no residue left by either the shampoo and/or the conditioner by lifting the fur throughout the side of the body, around to the chest and neck, especially the armpits as leaving soap anywhere will cause irritation and discomfort.
The right-hand side's turn!!
1. Turn your pet around and follow the same process as before from the beginning, starting at the base of the rear right paw (pads), working the water upwards and inside/underneath, up the back and belly, the pads of the front right paw, leg, chest and neck.
2. Repeat the shampooing in the same order as before.
The head
Now, the head can cause lots of drama. The animal will likely feel scared, so extra care must be taken here.
1. Lessen the flow of shower water as well as the temperature a little.
2. Showering and shampooing around the ears, we make sure not to get any soap inside the ear canal. Give both ears a good scrub around the base and inside the ear flap itself but don't let any water go inside the ear. You can place an ear flap in between your palms (fingers if they are small flaps) and lather, being sure not to go in circular motions in long-haired breeds.
3. Making your way down the face with special care not to get shampoo in the eyes, pay special attention to the chin, cheeks and bridge of the nose. Carefully remove any excess eye "sleep" (discharge) which have stuck around the tear ducts - use soap-free fingers or a wet cloth.
4. Once the head is all lathered up, you can rinse it all off. Rinsing and pushing the water away in repeated strokes, lift layers to remove the soap. Once the head, neck and chest are completely free of shampoo, you make your way back down the body's right-hand side towards the tail and the rear right leg down to the paw again. All the time, you are pushing the dirty water away from the clean body.
5. If necessary, use conditioner sparingly and follow the same routine.
==========================================
Tip! Regularly shower down the walls of the bath to remove soap suds which will find themselves back on the body you've just cleaned if you're not careful!
==========================================
5. Once you see no soap/conditioner residue in the base of the bath and you've double-checked there is none anywhere in awkward places - armpits, belly, reproductive and bum, the base of the tail, you should be finally finished!!
6. Sounds complicated, but once you get in it, and if your dog or cat behaves, it can be a fast process. Larger animals will take longer than smaller ones. Have treats ready to give during and afterwards to positively reinforce the experience.
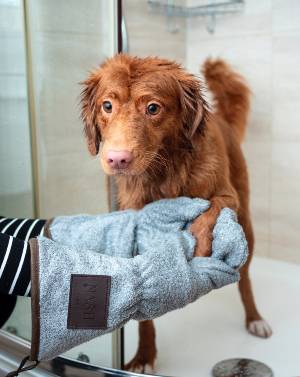
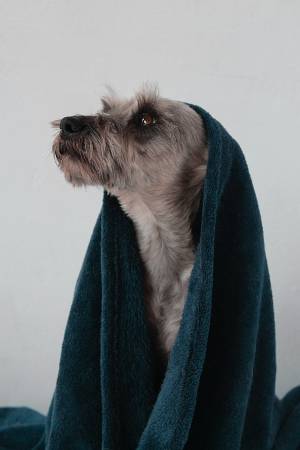
7. Body temperatures can drop quickly, so it is essential to remove excess water as soon as possible. The coat (if long) can be "squeezed" out, as you do after washing your hair. Then towel down your pet (dabbing and rubbing down in one direction, not circular movements) from head to toe. Be sure the insides of the ears and flaps are dry and also between the pads of the feet. Not doing so could cause fungus infections as in humans.
8. Using a professional-grade hairdryer, finish drying off on a low heat setting but introduce it to your pet earlier on so they accustom to it and are not frightened during the session.
9. While drying, the groomer will use whichever tools are necessary for the given coat and dry and style it as appropriate. There should be no tangles found during the drying process.
Early warnings
Having regular grooming sessions for your pet will maintain their coat in the most beautiful condition while giving you a heads up to potential problems before a visit to the vets is necessary. The extra care and attention given to your pooch during this time will only improve their overall wellbeing. However, in between sessions, calling your vet is the first thing you should do if you notice your animal is uncomfortable in any way.
Next time, we will look at which techniques a groomer uses before and after the bath.
Dog Grooming Tips For Beginners - It's Bath time!
Do you groom your beloved at home or with a professional pet groomer? Do you have any tips or recommendations? I'd love to read your comments below.
If you like, then please use the share buttons above to reach friends and family, many thanks.


Very interesting article. Our daughter had a dog and they take him to the groomers regularly. However, they have had to bath him themselves several times when he had an unpleasant encounter with a skunk. How frequently should a dog visit the groomer? Is it different for cats?
Hi Deb. A skunk encounter… oh dear! For dogs, I´d say every 2-3 months is good for a dog. Of course, it will depend on their breed or if your dog is rolling around in mud every day or just spends his time on the sofa. Also, it depends on any skin conditions they may have – maybe regular bathing with a special skin shampoo might be required so it´s best to get individual advice from the vet or professional groomer. Re cats, they are more hygienic naturally. However, if they have been ill (dirty bum), or they are also muddy or smelly, then they should be groomed straight away as leaving them dirty (and if they´re not inclined to clean themselves), can be detrimental for their health.
I don’t have any pets nowadays, but we used to have a cat when I was a kid – he hated being put in the bath, so my mum only did it once in a while. Do you think that you can ascertain the mood a cat is in, to work out whether it would be more likely to jump out of the bath?
Very informative article about grooming your pet dog. I enjoyed reading step by step instruction and felt like I am watching a video. That’s how clear it was!
Thank you
Best Wishes
Great article on dog grooming tips for beginners!
I have a dog groomer that comes to my house every 6 weeks but I could use this valuable info if she isn’t able to make it one day. I like giving them baths every 3 weeks the tips you have here will help so much.
Best wishes!
Hello. I just love the detail you have put into this article. Grooming or washing dogs can be challenging at the best of times. I have found with my dogs at least, when bathing them keeping my voice calm and praising them trough the whole process makes for a much better outcome for everyone. They are also less stressed during the process.
Hi Susan,
I thoroughly enjoyed reading your article! It can be so helpful to anyone not skilled enough, but wanting to do the grooming by him/herself. It gave me some new knowledge, as well.
I have a short-haired dog. She is a mix between pit bull terrier and staffordshire bull terrier and she has been sitting in front of our gate one evening when she must have been around six month old. She is with us since and is around three years old now.
At the beginning, we went to the groomer, but for around two years, we bath her on our own.
She jumps into the bathtub herself now. We used some treats in the bathtub at the beginning to teach her, as you also suggest. Since then, she knows she’ll get a treat after and sometimes even doesn’t want it when we are finished.
We always finish all the body before getting to her head. She has learnt to lift her chin high, so I can wash her forehead and the neck up to her mouth even with the help of the shower and then we go on with a soft flannel from there, pouring carefully water over her muzzle from a small jar.
We tried the drying with a hairdryer, but she hated it at the groomer’s as well, so we do give her a very thorough drying with towels and she lies down on her favorite mat which is positioned to be at direct sunlight through the window, or she goes outside if the weather permits. Having short hair, she is dry quickly, even her skin.
It has worked so far, sometimes I even get the impression she likes it occasionally. Luckily, we had not any skin or infection or similar problems so far.
Hi Simon. I think if a cat has been introduced to the bath as a kitten then there should be no issue at bathtime. However, as you say, most cats won´t put up with it and will, of course, jump out. I can only go on personal experience in that when our cat is sleepy, then she is calmer in the bath and let me hold her while I showered her but she couldn´t wait to get out once she´d woken up properly, but that gave me enough time to do the wash, albeit very quickly.
That´s great, Habib. I´m glad it was clear enough to understand.
Thanks Alyse. I´m glad you can get some help from the post and hope you and your dogs enjoy your bathtime together. Do they get dirty very often then?
Exactly Felicity. A calm voice throughout the whole process is definitely a must. It really helps. Shouting at them if they don´t turn or behave will only make the whole experience bad for all involved. Positivity reinforcement and calmness.
This is excellent, Minaher! Well done! It sounds to me like that your dog found herself the perfect forever-home when she was at your gate that day. Your whole routine sounds wonderful especially as you´ve made it a positive experience for her. The hairdryer will be frightening to an animal unless they´ve been habituated since they were young. It is a very noisy thing after all. You sound like a very kind and considerate person.
Hi Susan,
Great article! This is very detailed and concrete information about dog grooming. We are proud cat owners and were wondering if you had any tips for grooming our long haired fur babies? 😉
Kind regards,
Catherine
Hi Catherine. Thank you! Well, for starters, as your cats have long hair, daily brushing is essential which I’m sure you already know/do. If they aren’t keen, try when they are in a calm frame of mind by giving them a treat together with a smell of the brush and then another treat afterwards so as to positively encourage them. Speak to your local professional groomer who can advise which tools are appropriate for the breed as the wrong tools might damage the hair. However, in general for long-haired cats, an undercoat comb and a wide-tooth comb will work. I’m sure they haven’t got fleas but you’ll finish off with a flea comb.